
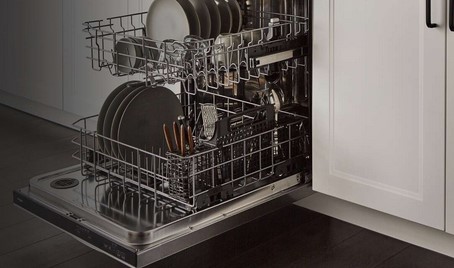
Sometimes it’s difficult to diagnose a fault just by looking at your Whirlpool dishwasher. At other times, you can’t even tell that the dishwasher has a problem, and that’s where the Whirlpool dishwasher diagnostic mode comes in.
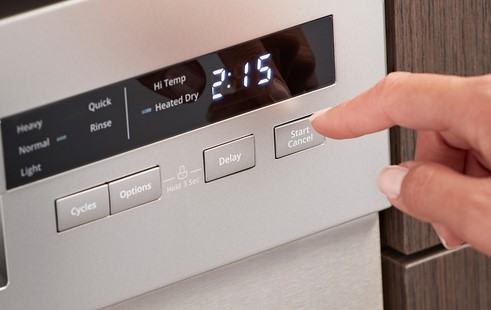
You can put your Whirlpool dishwasher into diagnostic mode by disconnecting it and pressing Start/Pause + On/Off, Rinse + Start, or Start/Cancel + Cycles within 1 minute while the door is open. Alternatively, press three consecutive buttons beside Start, Cancel, and Delay in 3 cycles.
So, there are at least four techniques to consider when putting a Whirlpool dishwasher into diagnostic mode, and I will share them with you. The whole essence of the diagnostic is to identify error codes that will point to a particular dishwasher malfunction.
In that case, it becomes easy to troubleshoot the dishwasher once you know what you are dealing with. Let’s jump into the four techniques to determine how to enter your Whirlpool dishwasher into diagnostic mode.
After that, we’ll see what happens during the diagnostic and discuss the various fault codes and their fixes, and how to reset the codes and exit the diagnostic.
Here we go!
In a hurry? Here’s a summary of the four diagnostic techniques:
A Summary of The 4 Whirlpool Dishwasher Diagnostic Mode Techniques
| – | Diagnostic Technique | Key Steps |
| 1. | Start/Pause & On/Off Diagnostic | Turn off, disconnect, and reconnect the dishwasher and then press Start/Pause + On/Off within 1 minute |
| 2. | Rinse & Start Diagnostic | Turn off, disconnect, and reconnect the dishwasher and then press Rinse and Start within 1 minute |
| 3. | Start/Cancel & Cycles Diagnostic | Turn off, disconnect, and reconnect the dishwasher and then press Start/Cancel and Cycles in 1 minute |
| 4. | Three-Buttons Diagnostic | Press any three consecutive buttons which aren’t Start, Cancel, or Delay in three quick repetitions |
How to Put a Whirlpool Dishwasher in Diagnostic Mode?
Here are four ways you can enter a Whirlpool dishwasher into diagnostic mode:
1. Start/Pause & On/Off Diagnostic
As the name suggests, this diagnostic procedure requires you to press the Start/Pause and On/Off switches, and it involves these steps:
- First, turn off your Whirlpool dishwasher until there’s no lighting LED
- Plug out the dishwasher and plug it back in after a few seconds
- Ensure the door is open (open it if it’s not) and press Start/Pause and On/Off consecutively
- You should press the buttons within a minute of plugging back the dishwasher
- Shut the door and wait for the dishwasher to run the diagnostic
2. Rinse & Start Diagnostic
You can also run diagnostic on your Whirlpool dishwasher by only pressing the Rinse and Start buttons. Here’s how to go about it:
- First, turn off and plug out your dishwasher
- Open its door and plug it back in after a few seconds
- First, press Rinse and then Start or press the two buttons consecutively
- Do everything within 1 minute before closing the door
- Wait for the dishwasher to run diagnostic
3. Start/Cancel & Cycles Diagnostic
This diagnostic technique is like the first one, only that you press different sets of buttons. Here’s how you do it:
- Turn off and disconnect the dishwasher
- Plug it back and leave the door open
- Press Start/Cancel and Cycles within 1 minute of reconnecting the unit
- Close the door and wait for the dishwasher to run, and complete the diagnostic
4. Three Buttons Diagnostic
This last diagnostic technique requires you to press a set of three consecutive buttons on your dishwasher other than Start, Cancel, or Delay in the following format: 1,2,3,1,2,3,1,2,3
Once you do that, the dishwasher should automatically enter a diagnostic, and you have to wait for an error code to pop up, if any.
What Happens During the Whirlpool Dishwasher Diagnostic?
As mentioned, putting the dishwasher in diagnostic mode helps to identify error codes that point to an issue or fault on your dishwasher, which you should troubleshoot.
So, it makes troubleshooting easier by eliminating guesswork. Overall, the following events take place before an error code pops up on display:
- The water inlet valve turns on to allow up to 3 liters of water into the dishwasher
- The wash pump and its heater also turn on after every 30 seconds. You have to press Start when the dishwasher stops after the water temperature reaches 570C (or 134.60F)
- The wash pump turns on for about 8 seconds, and the pump dispenser for about 45 seconds
- The dishwasher then pauses for about 30 seconds before the drain pump turns on for about 30 seconds
- There will be a one-time beep at the end of the diagnostic, followed by an error code
Whirlpool Dishwasher Diagnostic Mode Codes
The end goal of running diagnostics is to identify hidden faults, which you can tell from the error codes that pop up. Here’s what to know about the various fault codes that may pop up:
1. F1E1 or 1-1
(Meaning – Stuck Relay)
The error code F1E1 or 1-1 indicates a stuck relay on the dishwasher’s electronic control board (ECB).
Fix
Reset the dishwasher to see if the error will go. If it doesn’t, check for faulty wiring. If there’s none, replace the ECB.
2. F1E2 or 1-2
(Meaning – Corrupted Control Board Memory)
The fault code F1E2 or 1-2 indicates that the control board memory is corrupted.
Fix
Reset/restart the dishwasher by powering it off for about 5 minutes. If the error persists after that or the dishwasher doesn’t restart, replace the control board.
3. F2E1 or 2-1
(Meaning – Stuck Button)
The fault code F2E1 or 2-1 pops up when there is a stuck button on the dishwasher’s user interface control.
Fix
Reset the dishwasher and wait to see if the drain pump will run. If it doesn’t, replace the ECB (Electronic control board).
4. F2E2 or 2-2
(Meaning – ECB Communication Failure)
The error code F2E2 indicates a miscommunication between the ECB and the user interface control.
Fix
Restart the dishwasher to see if the error code will go off. If it doesn’t, consider replacing the ECB.
5. F3E1 or 3-1
(Meaning – Thermistor Fault)
The fault code F3E1 or 3-1 pops up when there’s an issue with the thermistor. In this case, the thermistor cannot detect the debris amount/level in the dishwasher water. Perhaps the reason could be the sensor and the ECB.
Fix
Check for a broken wire harness and fix it. If there’s no damaged wiring, replace the sensor/thermistor.
6. F3E2 or 3-2
(Meaning – Short-Circuited Thermistor)
The error code F3E2 or 3 – 2 shows up when the thermistor sensor (or OWI sensor) short circuits. When it does, communication between the thermistor and the ECB is lost.
Fix
Check for a broken wiring harness and replace it. And if there’s none, replace the sensor.
7. F3E3 or 3-3
(Meaning – Malfunctioning Thermistor/Drain Hose Fault)
The error code F3E3 or 3 – 3 pops up when the thermistor malfunctions, just like F3E1. That’s not the only trigger. This fault code also pops up when the drain hose check-valve fails. In that case, it allows wastewater backflow.
Fix
First, check the check-valve and replace it if it’s faulty. If it’s not, reset the dishwasher, but if the error code won’t go, replace the thermistor.
8. F4E1 or 4-1
(Meaning – Circulation Pump Communication Failure)
The error code F4E1 or 4-1 shows up when there’s failed communication between the circulation pump motor and the ECB. Often, that’s a result of a loose or damaged wiring harness.
If not, the motor, the circulation pump, or the ECB could be faulty.
Fix
Check for loose or broken wires and call an expert or fix them. If that doesn’t work, replace the motor and the circulation pump. But if that doesn’t work, replace the ECB.
9. F5E1 or 5-1
(Meaning – Door Switch Fault)
The fault code F5E1 or 5-1 shows up on your Whirlpool dishwasher when there’s a problem with the door switch. It could be that the door switch is defective, or perhaps the door latch is broken.
Fix
First, try to close the dishwasher door and restart it. Replace the door latch and wiring harness if the error won’t go.
10. F6E1 or 6-1
(Meaning – Dishwasher Won’t Fill with Water)
If something prevents the dishwasher from filling up, the error code F6E1 or 6-1 will show up. Often the cause is a disconnected water supply tube, a turned-off water shut-off valve, failed power, or a defective water inlet valve.
Fix
Ensure the water supply valve is connected correctly, the shut-off valve is open, and the dishwasher has power. If everything is fine and the error disappears, replace the water inlet valve.
11. F6E2 or 6-2
(Meaning – Defective Inlet Valve)
If the water inlet valve malfunctions, the error code F6E2 or 6 – 2 will pop up. Use the multimeter to examine the valve’s resistance and determine if it’s defective.
Fix
Replace the water inlet valve because its resistance is infinite. It should be around 1400 ohms for a working water inlet valve.
12. F6E4 or 6-4
(Meaning – Open Float Switch)
A stuck float switch will trigger the error code F6E4 or 6-4 to show it’s open. But it’s essential to ensure the water fill valve is wrong.
Fix
Replace the float switch.
13. F6E6 or 6-6
(Meaning – Extra Cold Incoming Water)
If the incoming water is less than 1100F colder, the error code F6E6 or 6-6 will pop up. That was a problem with the water heater, which could not heat it, or perhaps a lack of communication due to a defective thermistor or ECB.
Fix
First, replace the thermistor; if that doesn’t work, replace the ECB. However, call a pro if you still can’t reset the error code.
14. F7E1 or 7-1
(Meaning – Faulty Heating Element)
Expect the error code F7E1 to pop up when the heating element fails. In such a case, it’s unable to heat the dishwasher water.
Fix
Replace the heating element.
15. F8E1 or 8-1
(Meaning – Slow Drain)
The error code F8E1 or 8-1 pops up when there’s an issue with the dishwasher’s drainage. Here the dishwasher drains slowly, primarily due to an obstruction or defective drain pump.
Fix
Clean the drains and even the drain pump, but if the error won’t clear, replace the drain pump.
Whirlpool Dishwasher Fault Codes Reset
Sometimes all it takes to clear a fault code from the Whirlpool dishwasher is to reset it. That’s possible using any of these reset options.
Option 1 – Press the Start/Reset button and wait for the dishwasher to reset. Consider option two if it doesn’t.
Option 2 – Press the Off/Power switch until all the lights go off. Then unplug the dishwasher for at least 1 minute and plug it back in.
Option 3 – If the dishwasher won’t reset after option 2, pick a pots & pans or High Setting on the control panel and press it. Then wait for a minute before restarting the dishwasher.
How to Exit a Whirlpool Dishwasher Out of Diagnostic Mode?
The easiest way to exit your Whirlpool dishwasher from diagnostic mode is to hard-reset it. That requires you to plug it out for 10-15 minutes. Alternatively, you can flip its breaker off also for 10-15 minutes.
Concluding Thoughts
Above are the four ways to enter the Whirlpool dishwasher diagnostic mode and identify hidden fault codes. Once you get the fault codes, you can try to find their meaning using the above guide or your manual and then try to troubleshoot it. However, if unsuccessful, contact Whirlpool support!
Also Read: